Gallery - Combined techniques
English | Nederlands
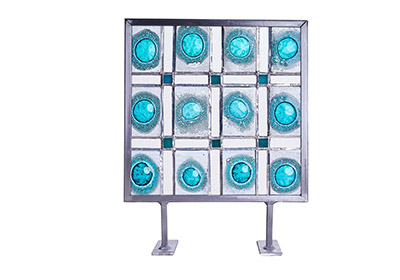
Combined techniques: Bubble Screen (W x D x H: 26 x 1 x 33 cm)
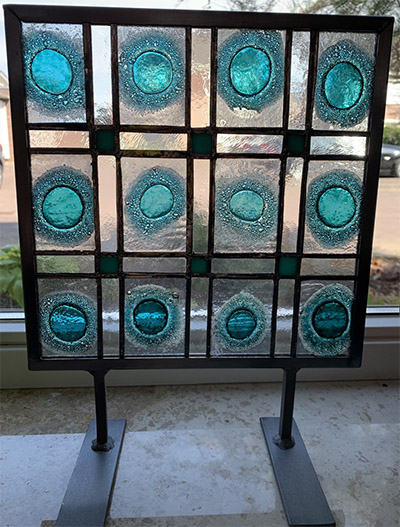
Combined techniques: Bubble Screen, in living room
For the work depicted above I first made the rectangles with bubble powder in between two layers of float glass. It was put in a kiln at fusing temperatures.
Every rectangle was then wrapped in copper foil.
The clear glass in between the rectangles is a thick as the rectangles, the tiny green squares are two pieces on top of each other.
Again all of it was wrapped in copper foil, and afterwards soldered together.
To give stability to this work it was framed with stainless steel. The work in the photo has now been sold.
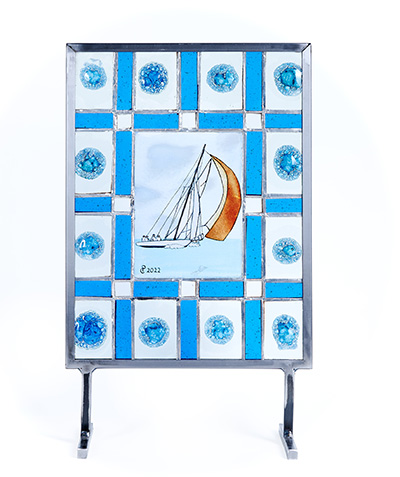
Combined techniques: Regatta (W x H: 25 x 40 cm)
The regatta work was again made using a combination of techniques. The border around the drawing of the sailing ship consists of two small plates each with bubble powder fused in between. The drawing in the centre was stained with different colours and one of the sails was sandblasted to achieve the matt effect. It was then wrapped with copper foil, soldered together (Tiffany technique) and placed in a steel frame. This work was on display at the exhibition at the ECI building in Roermond in May - June 2022.
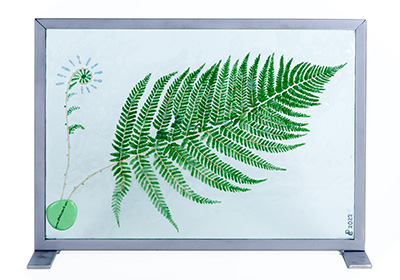
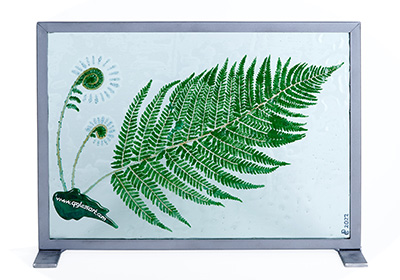
Combined techniques: Fern 1 (W x H: 50 x 30 cm)
The first fern work too is a combination of techniques. The fern was stained on the bottom glass pane. Bubble powder was then used on a second plate to create 'raindrops' on the large leaf and 'rays' around the budding fern. On top of that, a third glass plate was placed and fused separately. The three sheets were then fused together in the kiln. To disguise any stem ends, a fused marble was glued to the work. Finally, the work was placed in a steel frame.
Combined techniques: Fern 2 (W x H: 50 x 30 cm)
Compared to the first fern work, some parts of this fern leaf were drawn differently. What is more, for this work I did not use a marble but instead placed pieces of glass from the same sheet on top of each other, fused them and finally glued them to the work. The result was again placed in a steel frame.
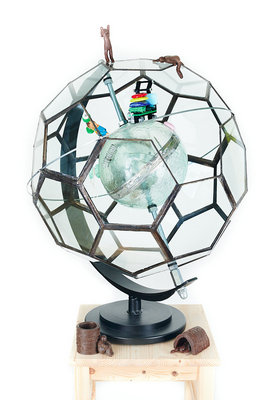
Combined technique: Globe 50 x 50 x 68 cm (W x D x H)
This globe was made as a graduation project for the perfectionism coach course. The globe consists of three spheres. The smallest sphere is fused and then stained with words. Finally, a steel ring is inserted between the two halves. The "earth's axis" runs through this ring. The second, middle sphere is also fused. The holes for the earth axis were drilled into the glass and then again attached together with a steel ring. On the outside of this sphere, a variety of objects have been applied, showing development from birth to the present. The largest, outer sphere is made of pentagons and hexagons like a football. Again, the "earth's axis" has been drilled through the glass. The "equator" is an additional reinforcement. The whole object hangs in a steel construction made by Hennes van Brienen. The figures to the left and right of the globe "tell" part of its development. The figures on top of the globe are the current state (climbing figure) and the goal that is being worked towards (cheering figure).

Combined techniques: Tree lamp (W x D x H: 12 x 20 x 30 cm)
To make the lamp's shade, lots of mostly green marbles were melted in the kiln. These were then wrapped in copper foil and attached together using soldering tin. A hole was left open in the centre to attach the top part to the base. The shade can be detached to replace a broken bulb (or LED or energy-saving bulb), if necessary.
Other galleries: